Sketches And Clothes

I’ve been doing a lot of sketching recently. Until recently, when I’ve been making models, they’ve been focused at making something ready to retopologise and rig, something I could put my shaders on to render. It’s difficult, and time-consuming…Having to thing about whether it’ll hold up from multiple angles, different zooms, if the retopology is sufficient for the posing it’ll need…It’s hard.

Yan suggested I should sketch more, and when I tried, it was quite fun. It’s a lot less stressful, I’ve found, when I sketch. Not having to worry about topology or think too hard on rendering. If I want an eye, I can just carve one in. Not have to make a particular cavity for an eyeball because it’ll need to be able to rotate by itself when it’s retopologised. It only needs as much detail as a sketch needs…Not realistic, refined details. It’s….A lot more fun and relaxing. I’ve found myself getting into it a lot more.

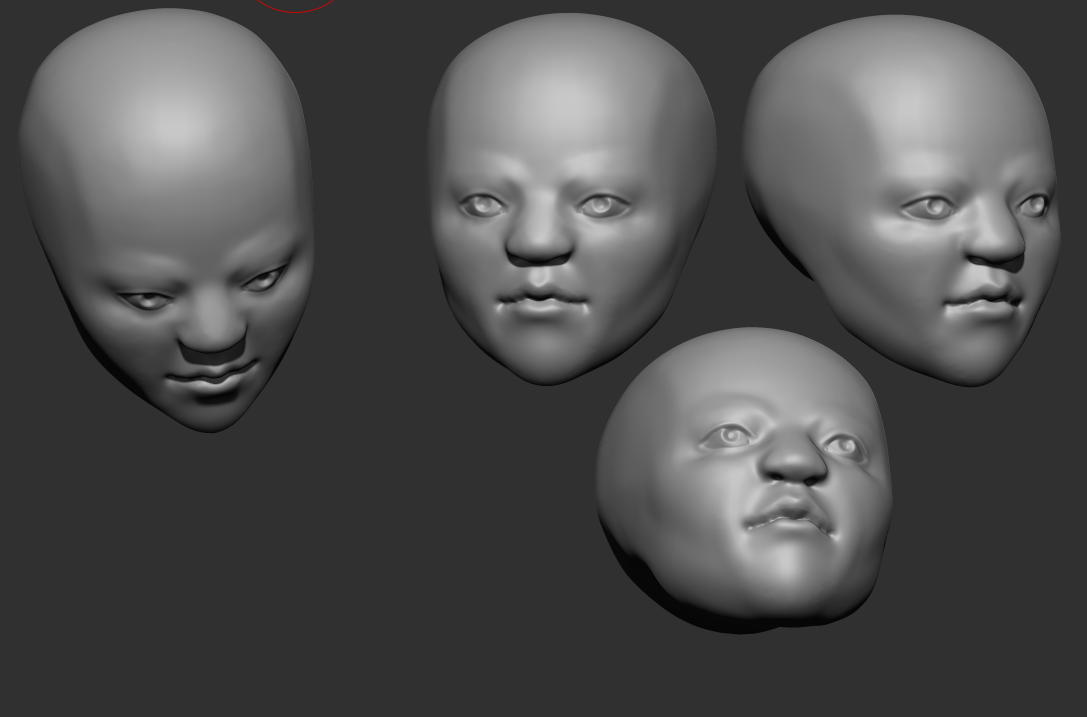
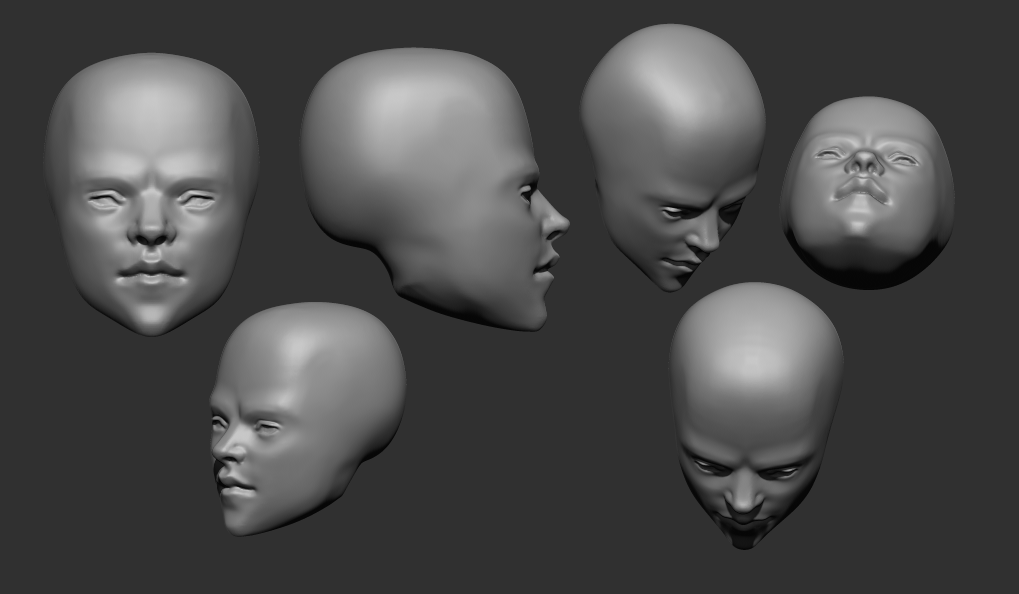
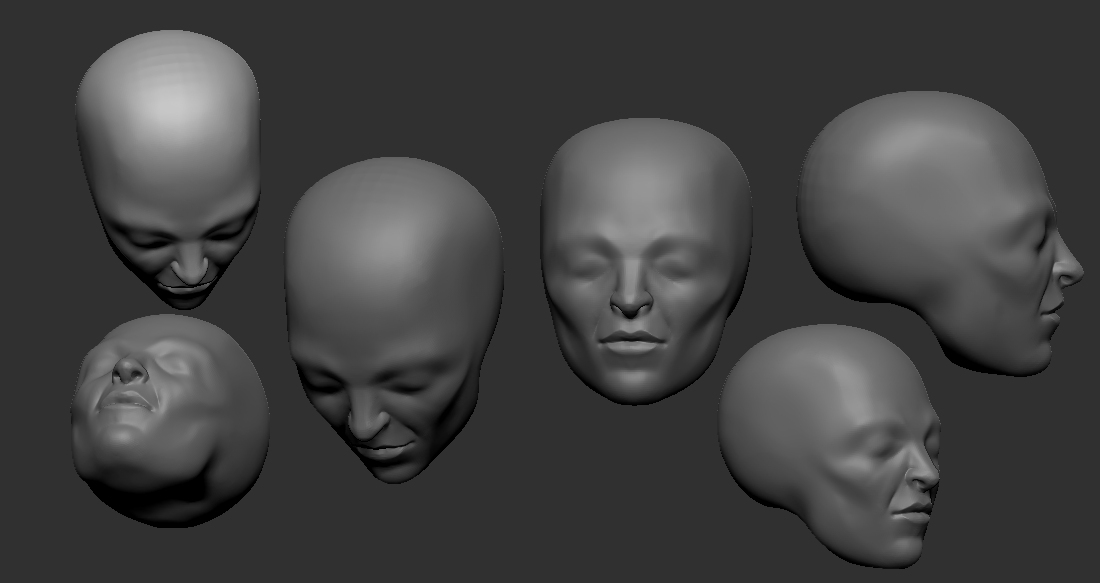
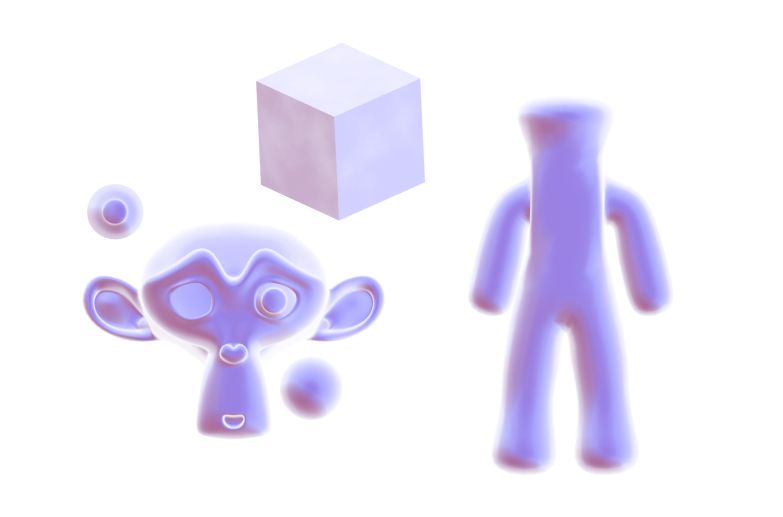
I’ve been sculpting a lot of heads recently. I really want to get better at them. The image on the top left is how they tend to look before I dynamesh them to smooth them out. I like to carve them out more than add volume; it feels more natural to me, and it makes it easy to make the planes. Then when they’re firmly established, it’s easier to keep the shape when smoothing it out. I was quite pleased with the top left one, for a sketch.

I’m also trying to sculpt different kinds of faces….More realistic, more stylised, boney, soft. I don’t want to be only capable of sculpting one type of face. Or end up as one of those annoying CGI character artists that can only seem to sculpt scantily-clad women.

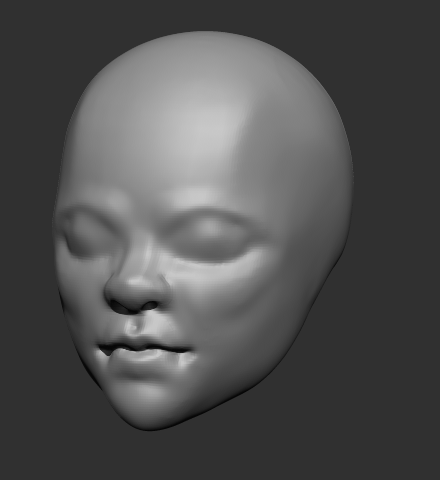
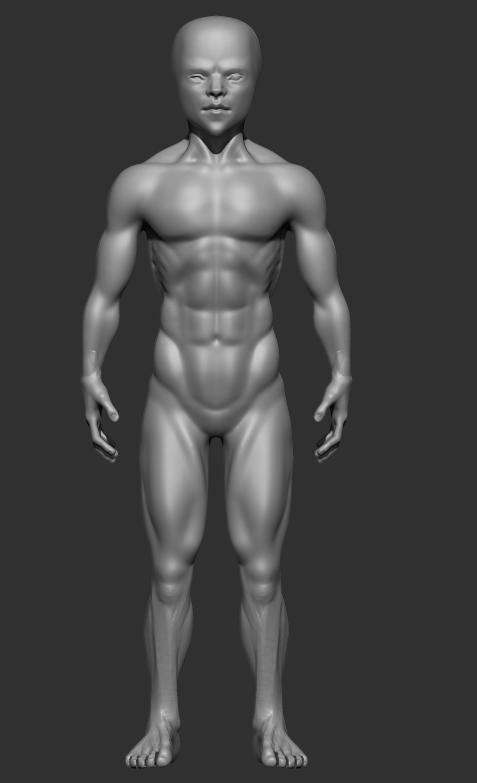
The male character there is a TKB model I’ve been working on. The face below that image is his. It’s difficult….For practice’s sake, I’ve focused on trying to learn realistic anatomy. But the Yugioh manga is very stylised, and they have very sharp faces. I couldn’t see Bakura, or any of them, with a very realistic appearance, like a wide chin or such. Takahashi’s style favoured sharp corners. So I tried to adapt that to a more realistic style, to make a semi-realistic type, keeping the sharp chin and nose, but not departing totally from reality. I’m not sure if I succeeded or not…But it’s a work in progress.

I feel fairly satisfied with his body, at least. It’s definitely not perfect, but it is better than previous ones I’d done. I took a bit of a different approach to sculpting the legs, which seemed to work out. The lower legs look better than previous efforts…Though the upper half isn’t great. I should also tweak the arms a bit…They don’t seem quite right. Too angular.

I also decided to practice making clothes. I’ve hit a wall here, unfortunately. ZBrushCore doesn’t seem to have good tools when it comes to making clothes with any complexity.

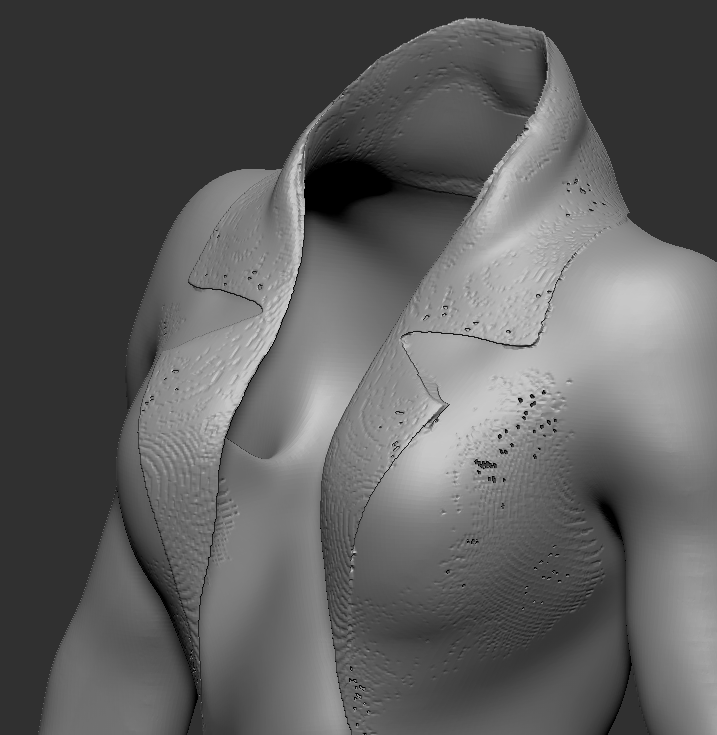
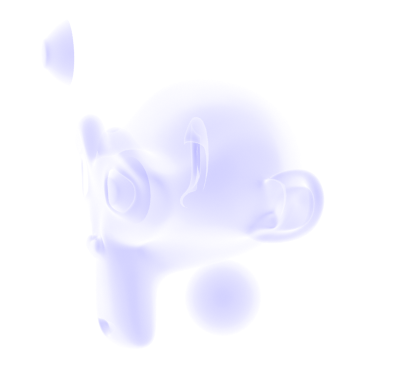
I tried making a jacket. This is an important test case because the flaps are a bit complicated. They fold over, but don’t connect, to the main jacket. Core doesn’t have any modeling tools, so I made it by masking and extracting. But when I tried to merge them, the image on the right happened. The dynamesh fuses it onto the jacket, and, I think because it’s narrow rather than thick, creates holes. It’s very frustrating….I realised working on that Maya model, it would be better to be able to just sculpt the clothes. Then I don’t have to mess about with topology until I have to retopologise it, and case relatively easily add things like zips, seams and buttons. But if it can’t handle something as simple as a flap, it’ll most likely choke on anything reasonable. And I really don’t want to have to model it and then waste hard drive space exporting it into ZBrushCore and then time having to align it properly. I tried using 3DCoat’s retopology tools to make a basic clothing mesh and then sculpt it there, but it can’t handle backfaces and lacks convenient tools to model anything that isn’t directly on the mesh, so I couldn’t really get it to work. They’d advertised their new cloth simulator and the support they’d put in the retopo room for making clothes, but it’s not really convenient for anything elaborate….Seems to be a running issue with 3DCoat.

So I’m very frustrated because of that. Character models aren’t good without clothes. I need to get better and able to make those. Especially given that some of them are very character-important, like TKB’s jacket in our version of citron. I have to find a solution.

Watercolour V8

I’ve upgraded my watercolour shader again. I found it was performing badly, so I rewrote it entirely. It worked better, for a while, but seems to have become slow again. I’m starting to think it’s just a Blender issue. I have also noticed, it’s become so complex, even recompiling it just for the material preview is very slow. It’s quite terrible.

I modified it to work better with retaining the colour on dark colours. Basically, it does the standard interpolation, then uses that for a second interpolation with a set border, only falling off from the retention amount to white after that point.

I also added ambient occlusion. It wasn’t difficult, but it’s harder to get right than normal shading. I may just end up faking it instead.

Lastly, I changed my interpolation function. It used to just switch between them, but now I’ve given it the ability to interpolate between different types of blending, for more varied results and more control. It’s not performing well, though; I should interpolate between their respective factors rather than doing all of those interpolations and then blending the result.

Somehow, this shader is a lot slower than V6 and V7. It might be the AO, or something else; I need to get to the bottom of it, because I need it to be fast and responsive.

I’m also finding, I need to work on the transparency. Things like sleeves are still an issue. I can bypass it by masking out bits manually that would be covered by worn clothing, but it’s inconvenient. I’d prefer not to have to deal with such things. I need a way to determine which things are occluded from view by others and not render them, but that seems like it would require ray tracing, which Eevee is not capable of at the moment. The edge soak is also rather weak on the skin-coloured monkey head.

A way to determine if it’s being viewed in perspective or orthographic would also be nice. It doesn’t display right in ortho anymore, because I used my depth-detecting function to scale the edge soak and edge noise textures so that they’ll stay relatively consistent whether they’re up close or far away.

I still have a very long way to go before this is what I want it to be. Still, this is progress. I also finished a character model of Maya, from Persona 2. By doing that, I worked out things I need to change. Next, I’ll make a post about that, then next I want to make Mariku, Ryou and the others.

Maya and Progress

I’ve spent quite a bit of time recently trying to get used to ZBrushCore and adapt to the way it works. I’ve become quite annoyed at myself; there are several things I didn’t know about it that would have been very useful if I’d known about them sooner. Like Dynamesh being able to preserve edges, or not, according to a slider. 3DCoat could make even topology using voxels, but was limited to the voxel grid, so it couldn’t preserve them. Having that feature has made it easier in ZBrushCore to do that. So I’ve been spending more time recently working in it and trying to adapt. I should have used it sooner, sigh. Although, from what I remember it was more expensive before, and didn’t have Sculptris Pro, its dynamic topology sculpting, when I looked before, but still.

In any case, I’ve been using it a lot. I’ve become quite accustomed to the controls now…I’m starting to see what proficient ZBrush users mean when they claim that it’s actually fine once you get used to it. When I went back into 3DCoat for some retopology, I had difficult navigating because I’d got used to way to do it in ZBrushCore.

So far, as far as workable model parts go, I’ve made a male and female base mesh. I made the male one for starters, mainly for practice. I want to make lots of character models…I’d rather they be bespoke, but sadly that’s just not practical. So, the next best thing is to make a base mesh to save time, then add unique heads and modify them into distinct models. That saves time, making it more workable, and is efficient.

I made the male one first, then retooled it into a female mesh. I was planning to make the female base mesh from scratch, but I really wanted to just have something. Looking at them now, the abs have kind of melted on the male one. I haven’t got the hang of smoothing just yet, entirely; I end up being a bit too aggressive with it. I want to make some proper models from these….Malik, Mariku, Ryou, Bakura, and lots of others. I didn’t give breasts to the female mesh; since those vary from woman to woman, it didn’t make sense to add them there. I don’t want to be one of those artists that gives all their female character models the same chest, or the same body type in general, at that.

I made hands and feet beforehand to practice and attach to the models. I didn’t get them quite right, though; the palm of the hand is bad, and the toes aren’t quite right. I sculpted them a bit differently to the way I saw in tutorials I got; I wanted them to be separate pieces, just in case that was ever a focus. It’s unlikely, since I don’t do anything focusing on feet, but I want the option.

Unfortunately, having put the effort in one details like the fingernails and toenails, they were erased by having to dynamesh them together onto the model. It seems ZBrushCore doesn’t have proper booleans. I have to resculpt them after. I also didn’t get them quite right, the way the feet are on the models. Legs in general, I’m very weak at.

I started making a model of Maya from Persona 2, to see if I could get a decent character model. I found that even ZBrushCore was slow if I subdivided the whole model high enough to get high details on the face like sharp creases, but I could mask an area and subdivide that, and, unlike 3DCoat, it was still smoothable within that area because they were quads. Although, it meant any smoothing at the edge of the subdivided area was problematic. I could sort of correct it with the decimation smoothing of Sculptris Pro, but not so well. Next time, I’ll have to leave the sharp details for very last and not get ahead of myself.

I think I managed to make a decent face. I still haven’t worked out mouth interiors, though, and the ears were terrible so I drastically simplified them. Right now, I’m relatively happy with the overall state of it, at least. I think I’ve confirmed that sculpting that way can get reasonable results, as far as mesh quality is concerned.

I retopologised it in 3DCoat, but didn’t end up baking there; the 2048×2048 limit is too low, and upgrading to the pro version is too expensive. I baked the normals from the high poly in Blender at 4096*4096, with one UV map for the whole body, for the sake of speed. It seems to give decent results, though for long term stuff, I should make proper UVs; I went with a mangled automatic one for testing.

I also, while I was there, tried a Fake SSGI shader I came across, by 0451 on the Blender Artists forum. It’s clever; it gives more realistic looking results, and responds to lights better than a standard Principled Shader does. I’m planning to experiment on my pseudowatercolour shader and see if I can apply any of this into it. I’m not satisfied with how responsive it is, especially due to the use of colour ramps. I know of a way I might be able to make it respond to colour, too, which I need to experiment with.

Using a very simple version on the normal mapped, low poly model, it seems to soften the shadows a bit, when using a sun lamp and a point lamp, whereas the standard diffuse doesn’t really do anything. I’m sure someone more savvy regarding lighting setups could highlight it better, but what matters is, it’s useful. I’ll experiment with it.

It was inconvenient getting the model this far, though. I’d rather have baked it in 3DCoat, but other than the inconvenient texture size limit, and shoddy implementation of UDIMs I’d have to work around, it triangulated the model on import, which messed it up a bit, so I had to avoid it by baking in Blender, which is quite an inconvenient program to bake in. I need to find a more elegant solution.

Still, I feel I’ve made progress. There are anatomical errors with these models, no doubt, but I feel like I can fix it technically. That I’m not being held down by some stupid problem in the software. That’s refreshing.

As for personally, it’s been a mixed bag recently. I haven’t been feeling very good, and had a relapse of self-harm. I haven’t been sleeping well, either….I couldn’t sleep for most of the night the other day, feeling horrible, and when I have been sleeping, it’s mostly been nightmares. Perhaps it’s my brain’s way of telling me to wake up and make myself useful, haha. I get hunted a lot in my sleep. I often die. The other night, I dreamt me and some others were running away from a monster. We got to an arena, with a sign claiming the only way to stop the monster was for two people to fight in the arena and one to kill the other. I didn’t have the heart to kill my opponent, and woke up muttering a volunteer for death, not for the first time.

My sister has been more aggressive recently, too. We’ve been arguing more. The other night I got told to drink bleach because I yelled at her for yelling about some stupid crap in a video game she was playing. I was quite tempted to swallow some just to spite her.

Things will probably get better. I’m making progress, I think. I need to make more.

Effie

So, I finally finished a model.

I wanted to make my Mariku model, but I decided to do a test model of another character first for practice and to see how my workflow would go. I decided to make one of Effie from Descender, before she was Queen Between.

I did two different lighting angles to test it. I’m fairly satisfied with my shader at this point….But not how I’m using it. I need to get more used to it, and adjustments I need to make to account for it. For example, the legs show through on the two images in several places where I forgot to turn on the clipping mask. I’d like a way to render them all as if 2d, if possible, all on one alpha layer, but I don’t know how I’d go about that with them as separate objects.

I also see I should change my linework. I was quite happy with the sketchy effect I was getting, but in practice, I don’t have the control I want; the nostrils, for example, get lines when I wouldn’t want them to, and it’s just…Inconvenient having to wait to see how it’ll look. I want as close to real time feedback as I can get.

I also need to work out the rigging. I used a proper armature this time, and then used the Data Transfer modifier to transfer the weights onto the clothes. She lacks her jacket in the render because I couldn’t get it to copy them and didn’t want to have to stop and rig that manually. I wanted to use the Mesh Deform modifier, but it was finicky and unreliable on this model, and having to unbind and rebind everything every time I changed the cage would be a pain. I also haven’t found a solution for unexpected behaviour triggered by having mesh deform and armatures at the same time.

I also just need to get better. The mesh quality is just not good enough. It doesn’t hold up to close ups and the anatomy isn’t good enough. Especially the legs. I’m not good at them.

Plus, I need to work out a better way to do the colours. I mixed them individually where needed, but because each colour has a set of values to go with it, it’s inconvenient. It’s just awkward. I could use two masks, one for total main colour and one for total shadow, but I worry it would damage the watercolour effect I’m going for, being too perfect and clean, whereas with multiple colours, the masks can be modified, such as adding edge soak at the borders, etc.

Lastly, I need to change how I’ll alter shading. The shader just won’t perform well enough to modify it in realtime with vertex paint as I’d wanted to. My experience of Blender’s texture painting makes me think it probably won’t handle using the texture-based method in a real scene, either. Normal editing is a nuisance, though. I’m uncertain what to do about it.

Still, I want to work something out. I’m making progress. I just wish I didn’t feel like I was constantly at the “If it was just a bit better…” Stage.

2020

So, I’m slightly late, but I decided to make a post about last year, and what I want from this year.

2019 was a bit of a positive year for me. It was difficult, personally, with some things that have been going on in real life, but I think for my art it was a bit better. I have a terrible perfectionism problem. Even with fics. But I was able to make a little bit of progress on it last year. I started writing True Sound, and did several chapters of An Unconventional Union already with Yan. I also wrote several more chapters than are currently released.

But, if you look at the amount of posts I’ve made here, and on my Tumblr…It’s not many. I experimented more, prototyped…But I didn’t do nearly enough finished works. I was still so bogged down trying to make it “good enough” and being bothered by how 3d it looked. Because of that, I didn’t finish much, even though I wanted to. I’m frustrated with myself for that. I want to do more. I want to be better and show my art and ideas, too. I tried last year to beat that stupid perfectionism, and I progressed, but it’s still there.

This year, I want to kill it. To make a lot more, and post a lot more, without worrying so much if it’s not perfect, or how NPR or 2d-looking it is. Those are my goals, but if I spend so much time trying to get one perfect thing, what will I have to show for myself? One thing.

Another thing I want to work on is my energy. I find for some reason, I’m frequently low on energy. It makes it difficult to do anything, and with the internet and such in easy reach, it’s too easy to end up vegging out for hours. Part of it is because I’m off my antidepressants, I’m sure. But I need to knuckle down and make myself focus, and, again, push that perfectionism aside. I have fics I want to write, and art to make. It won’t do itself. Though I’m told I should also take more breaks, too, rather than being constantly in a mindset of thinking I’m meant to be working. I find it difficult to relax these days. I hate it. I can’t seem to switch off, but being switched on doesn’t mean I’m in the right mindset or have enough energy. It’s like being awake enough that you’re not asleep, but too tired to move.

Still, I am trying. To prove that, I have some work in progress images to show. I started a Ryou model the other day. After spending a few hours, I was able to make his face and upper body. He also has a lower body, but, as per usual, it’s trash. I’m very, very poor at legs and waists. I invested in some videos about sculpting and anatomy that I need to watch to learn more, and get more references.

It’s extremely rough at the moment. I started out sculpting him a bit aimlessly. I’m not sure exactly what I’m doing with his face. I know that I want faces on my Yugioh art to be stylised in some way, but I’m not quite sure how, so I’m just trying to go with what I like.

Now that I look at it, the side is very squished. That’s not right at all.

I think the look I’m going for is sort of psuedo anime? Slightly stylised proportions and shape, but keeping some realistic elements, like realistic anatomy and proportions, and features like noses, rather than more common anime kinds like noses stylised to points, or, on very stylised or chibi characters, that sort of snout-shaped face.

Looking at Yugi’s hair as an example, I don’t think Yugioh characters would adapt to a totally realistic style very well. If he was rendered in complete realism, his hair would destroy it by looking unnatural as hell. It just isn’t how realistic hair looks or works, especially elements like the red edges to it; that could, maybe, be styled as his hair becoming redder at the ends or something, but that wouldn’t hold up from multiple angles. So, I think a semi-realistic style at most is best for him and the other Yugioh characters I want to make models of.

My other problem is that Ryou is very slim. I’m used to doing more muscular characters to learn anatomy, so I’ve made him far too fit just by default. I need to slim him right down until he looks suitably bishonen, haha. But truly, this model is, in its current state, embarrassingly bad. I didn’t reference a lot so far, partly because I couldn’t be bothered and partly because I was in the zone when I was doing it and didn’t want to kill my momentum. So it has lots of problems, like the terrible waist that has no hips, the weird shape from the side, the back being altogether horrible, the lack of ribs and serratus, which I basically flattened to oblivion because they were horrible…He’s too broad, to boot, and too narrow from the side.

I wanted to just power through it before I lost momentum by stressing about those, but I really should correct them before sculpting more on him. If he’s missing landmarks and correct muscle placement, it won’t look better when it’s slim and smoothed; it’ll only be blobby.

At least he won’t be this Blobby.

It’s really horrible to me, so far. Some work can fix it, and I’m going to try that. Yan encouraged me to show more wips and all, so I’m trying that. I want to show more of them as the year progresses, too. I’d like to get more skilled and able to finish them better and more quickly, though.

Still, this is something, at least. And when I put it through 3DCoat’s basic renderer, it doesn’t look entirely terrible with shading. There’s a lot to fix, but it exists, at least. And this as it stands, even when corrected, should be a far cry from how he’ll look with my shaders and NPR techniques.

So, I think I am making progress. Baby steps, maybe, but still, progress. I want to post more this year, so hopefully I’ll post some updates soon as I progress on him. I want to make a Ryou basemesh to derive our au-versions from, and do the same for other characters as well.

For now, I’ll just try and work on it when I have time, and try to push those negative thoughts out of my mind.

Shader Experiments and Improvement Attempts

My previous renders highlighted a problem I’d not thought of while modeling them.

The soft edges look fine against only the white background. They appear soft and match it nicely, giving at least part of the look I’m going for. But, it doesn’t work with environments, or anything behind the object that doesn’t match the colour of the “canvas”, the white colour that’s being mixed with the object colour.

So, to fix that, I’ve been experimenting with replacing that white edge with transparency.

I tried using the alpha blending mode Hashed first. But I had that the problem of the interior’s faces being visible. That makes a more even silhouette, except that the lines of the front highlight the hole, making it appear more 3D. Hashed is also much noisier; even when I rendered with high samples it appeared grainy.

I also found the transparency worked too well this way; you could see through the model from one side and out the other. Looking at it from behind, I could see the eye that should only be visible from the front. Thinking of it as something to imitate 2d, this is very wrong; a silhouette in 2d is just a flat shape without depth. You should only be able to see the side facing the camera. I tried to correct this by making the backfaces also transparent, but this lead to some undesirable behaviour, too, like the empty eye socket rendering as a hole. Although, to have it both ways there is impossible, and ideally I wouldn’t have any backfaces showing to the camera to begin with.

In any case, Hashed turned out to be insufficient, so I tried Blend, but it has the same problem. It’s less noisy, at least. I suspect my colour ramp controlling the Alpha is at fault for being too weak, in part. But I need some method to get rid of the faces on the other side of the object; to hide what shouldn’t be seen.

After that, I experimented more with how I was making my silhouette, for a change of pace.

I have another method besides the Fresnel to product the rough shape of an object, using the Normals and Location/Position. I quite like the way this one looks. It’s soft and easy to work with. It’s not as specific as Fresnel or Layer Weight on the edges, which makes it easier to make it look 2d. But that’s also a disadvantage; I have do more to make it match the basic shape of some objects. The rough person-shape I made on the right, for example, has much less colour on the limbs. I also found this wasn’t compatible with my current method of texturing the edges, so they’re too smooth and perfectly neat.

It subtracts the Location from the Position so that when it’s moved in the world the values won’t change. The Scale vector is plugged into Normalise from a previous setup I forgot to disconnect. The cross product with the incoming is what allows it to change with the view.

In the end, I concluded that that doesn’t work for me at the moment. It’s too incompatible with previous node groups I’ve made, and I’d like to be able to reuse them as much as possible. It’s also too much work to make that into a generally accurate silhouette. The trouble with the Fresnel method, on the other hand, is that it starts out too accurate and has to be manually modified.

My current stage of the shader, part-way through modification.

I could use a simpler mesh and the Data Transfer modifier with weights to give a simpler silhouette, but it increases the amount of work to make a character, or other object a default Fresnel edge won’t work well on. I’ll continue to look for methods to improve it.